
Are you establishing garden beds? Is there a lot of grass or weed pressure in the way? Are you looking to maintain excellent soil structure through no-till practices? Find out how I established our garden beds without lifting a shovel.
Read on…
The Challenge
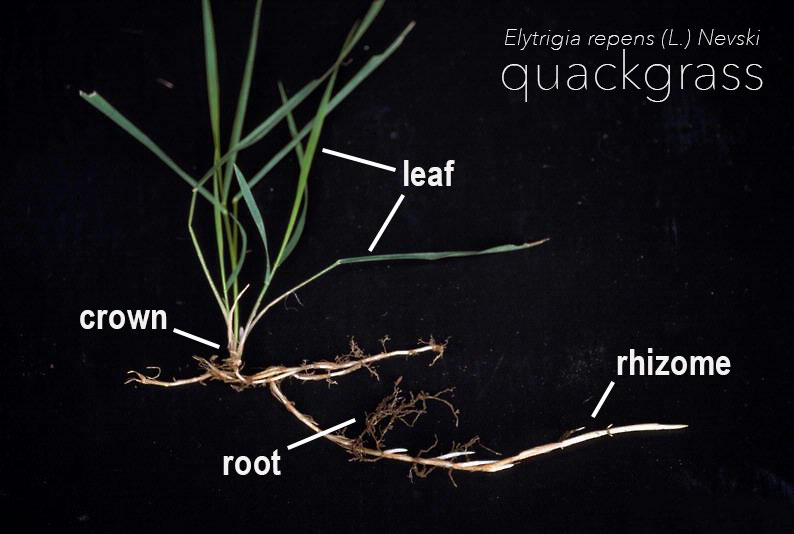
I needed to start our garden beds on a site HEAVILY saturated with the abundantly prolific Quackgrass. The primary challenge I found myself faced with was my inability to eradicate the grass in order to give the veggies a fighting chance. I began to believe this grass to be bullet proof.
- I started by mowing it aggressively followed by broadcasting a variety of pasture seeds in hopes of them coming up faster than the grass and eventually overpowering it – FAIL.
- Next I broke my own no-till rule only to see it spread and increase in vitality; – FAIL.
The Solution
My failed attempts at eradicating the wide-spread, cool-season perennial grass led to researching the origins of quackgrass and eventually to the discovery of good management practices. I post these results in hopes of:
- Sparing you similar frustrations and lost time
- And hopefully sharing our learned experiences together
But honestly, a lot of our problems are solutions waiting to be discovered. What I’ve come to realize is that quackgrass can be converted into useful products for us humans.
So how do you eradicate quackgrass without disturbing the soil and without lifting a single shovel?
When designing this permaculture homestead I spent a full year observing the land. During this time I had the serendipitous encounter that lead to my discovery of how to eradicate the quackgrass with as little effort as possible. The only element I had to deal with was time.
So how do you eradicate quackgrass without disturbing the soil and without lifting a single shovel? It’s quite simple, just cover it. I use a lot of wood chips here on the property. At one point, I had a large pile that sat for about four months. I finally got around to using this pile in the trough of the swales I built. Once all of the chips were removed, I discovered rich, quackgrass-free soil beneath teaming with Boa Constrictor-size worms and sandy loam.
With this discovery in hand, I marked off the ground where our annual veggie garden would be then covered it with black row cover from Brookdale Fruit Farm. I left this cover in place from September to March (about six and a half months). When I pulled back the plastic, what I discovered was the same rich, quckgrass-free soil beneath teaming with Boa constrictor-size worms and sandy loam. On top of all this, was a well composted layer of organic matter that was once tall quackgrass.
The steps I followed in order to establish the sandy loam garden plot are as follows:
- Put chickens in a paddock that makes up the size and space of the future garden. Left in place for 4 months (late spring and summer)
- In the fall, cover garden with black plastic row cover. Secure with ten inch staples and large logs (very windy here).
- Remove plastic row cover in spring.
- Place chickens back on plot for five days.
- map out garden and prepare beds.
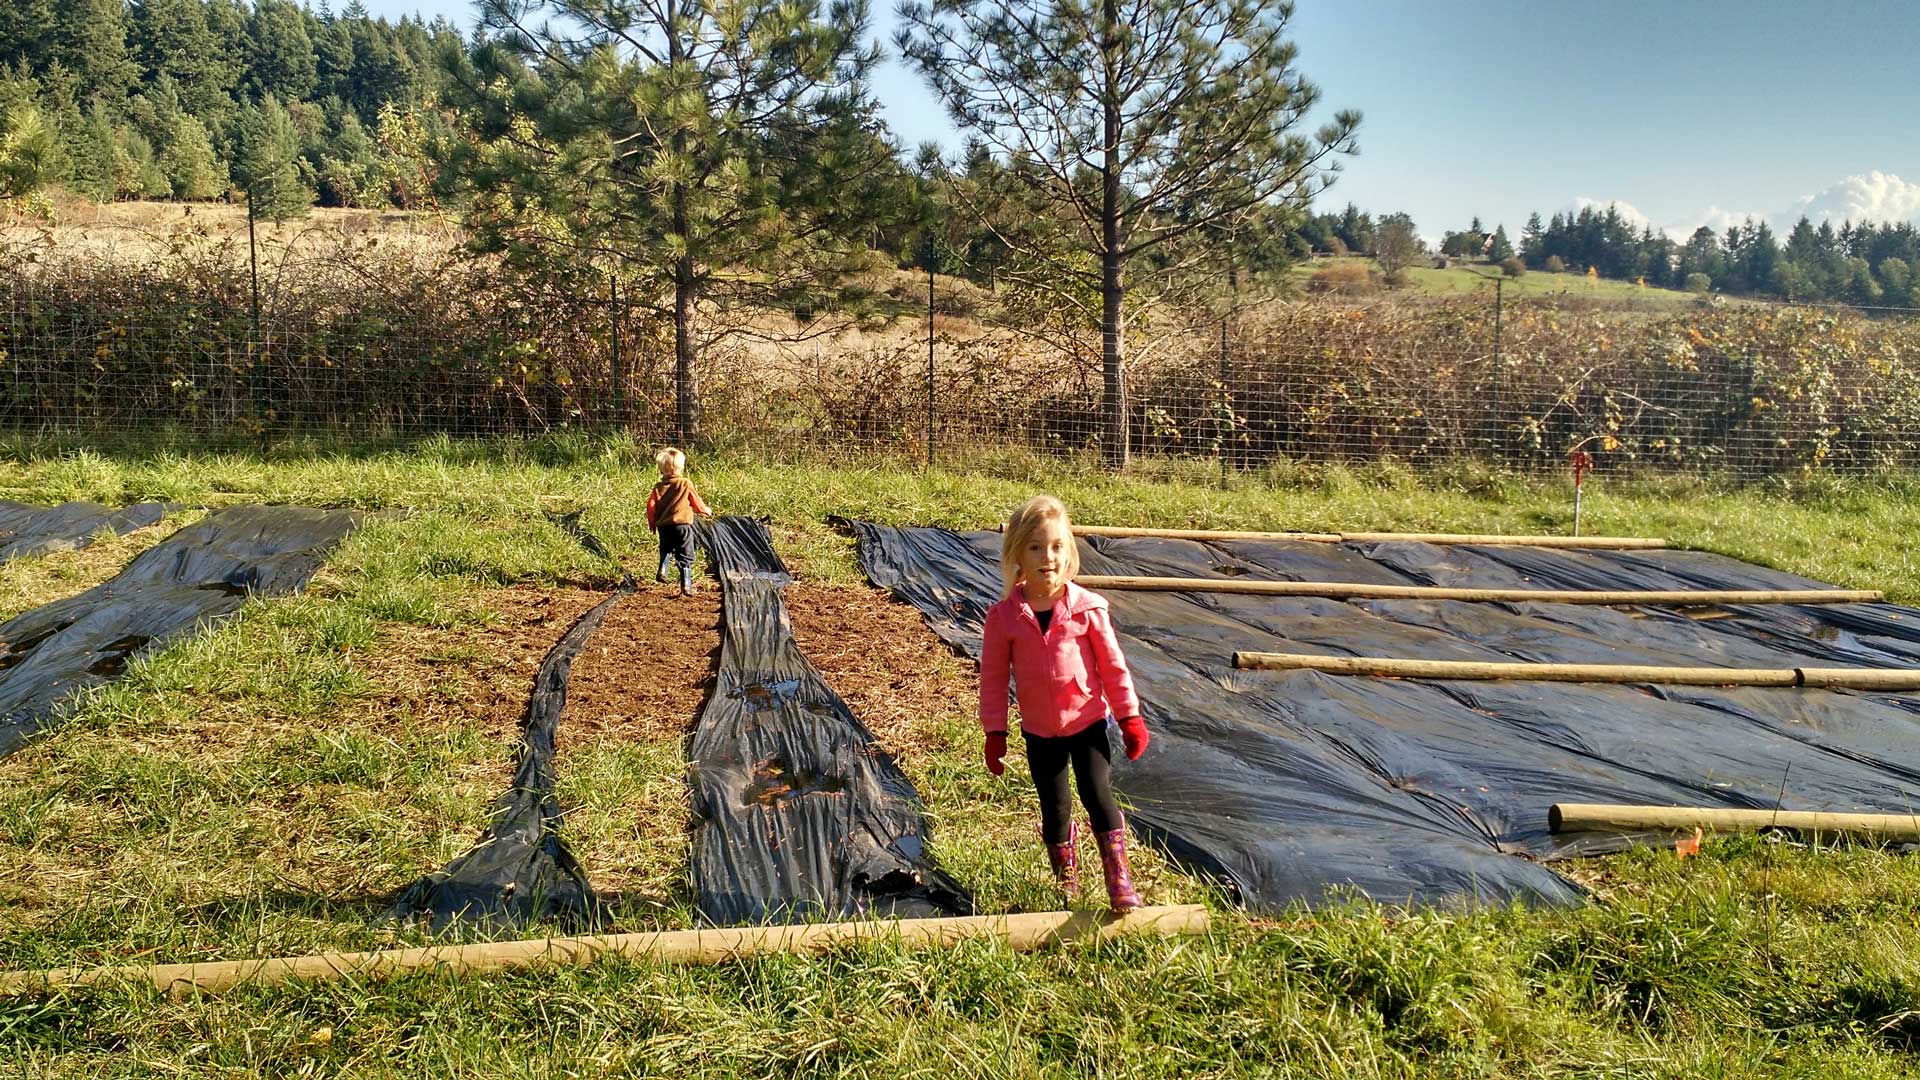
Black Row Cover In Place
Pictured here is the early stages when the black plastic was being put in place. One lesson I learned was to secure with ten inch garden staples and large logs (it’s very windy here).
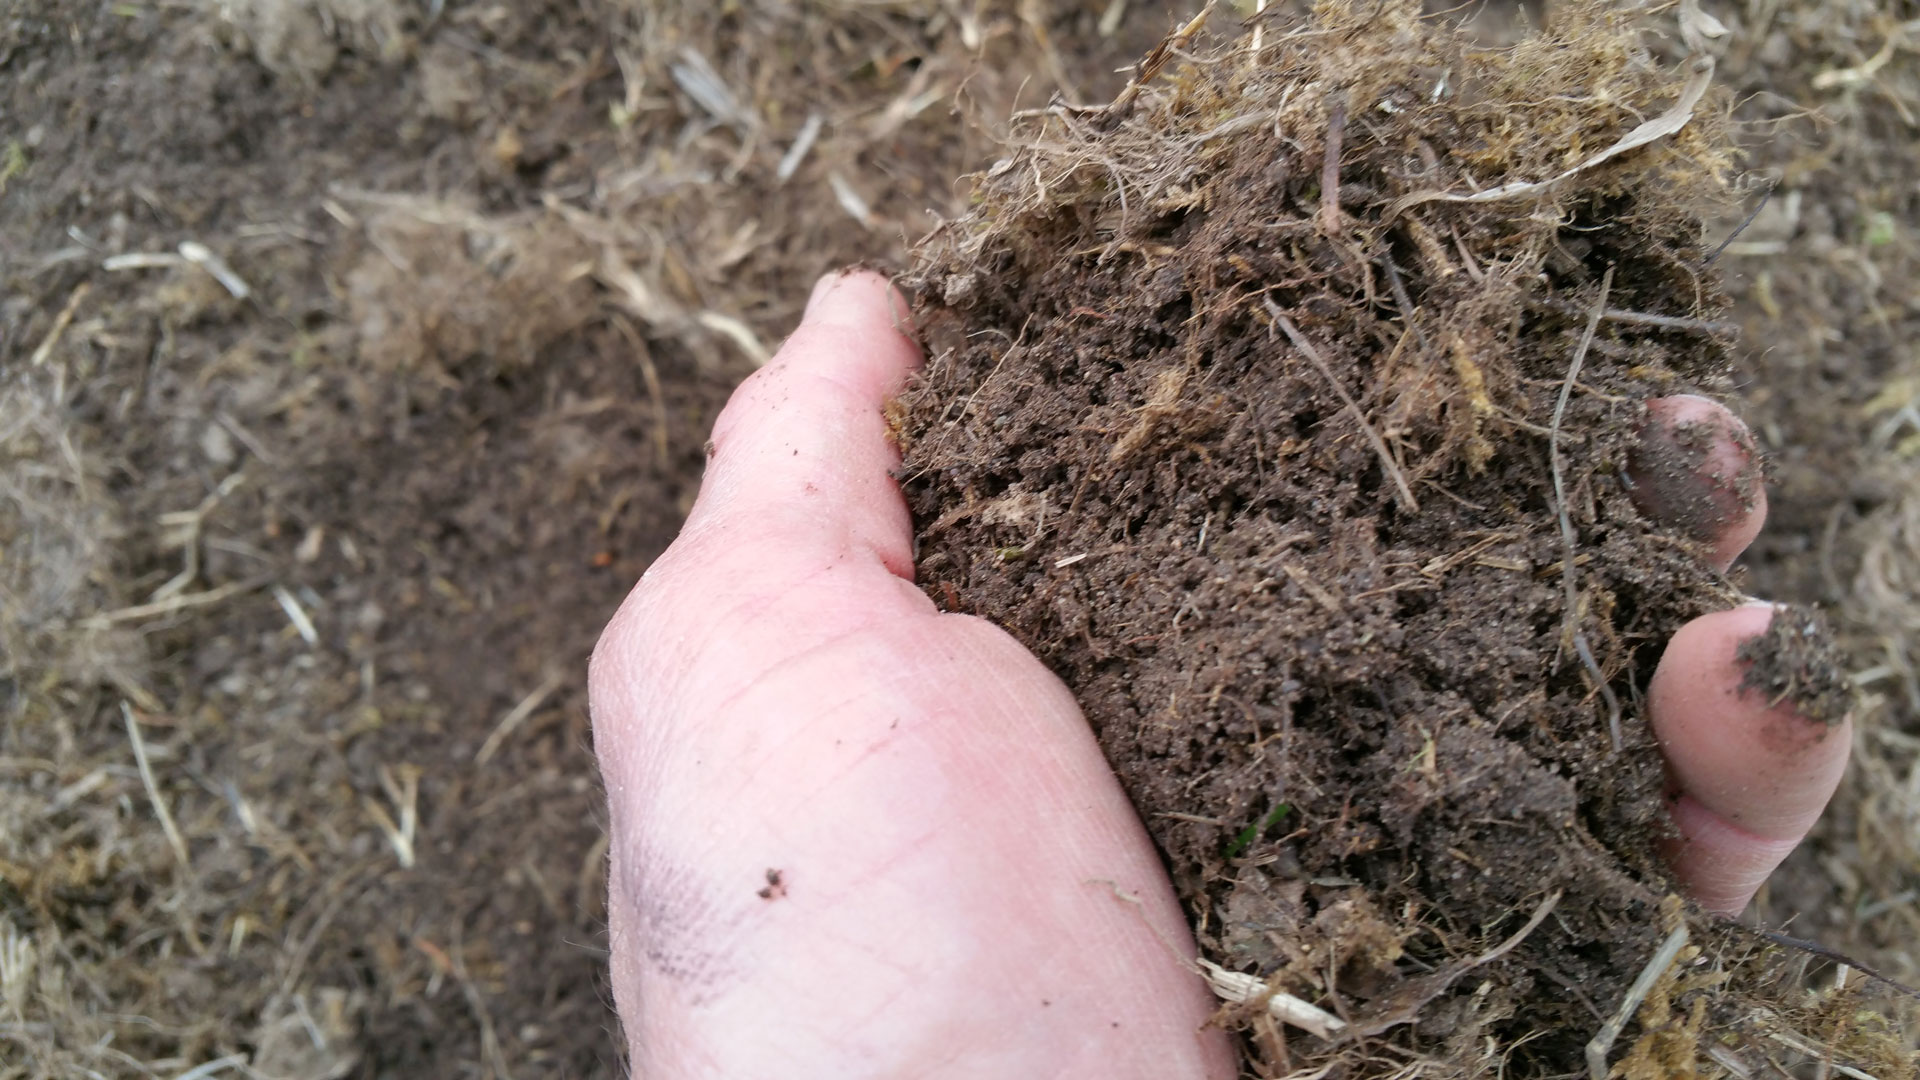
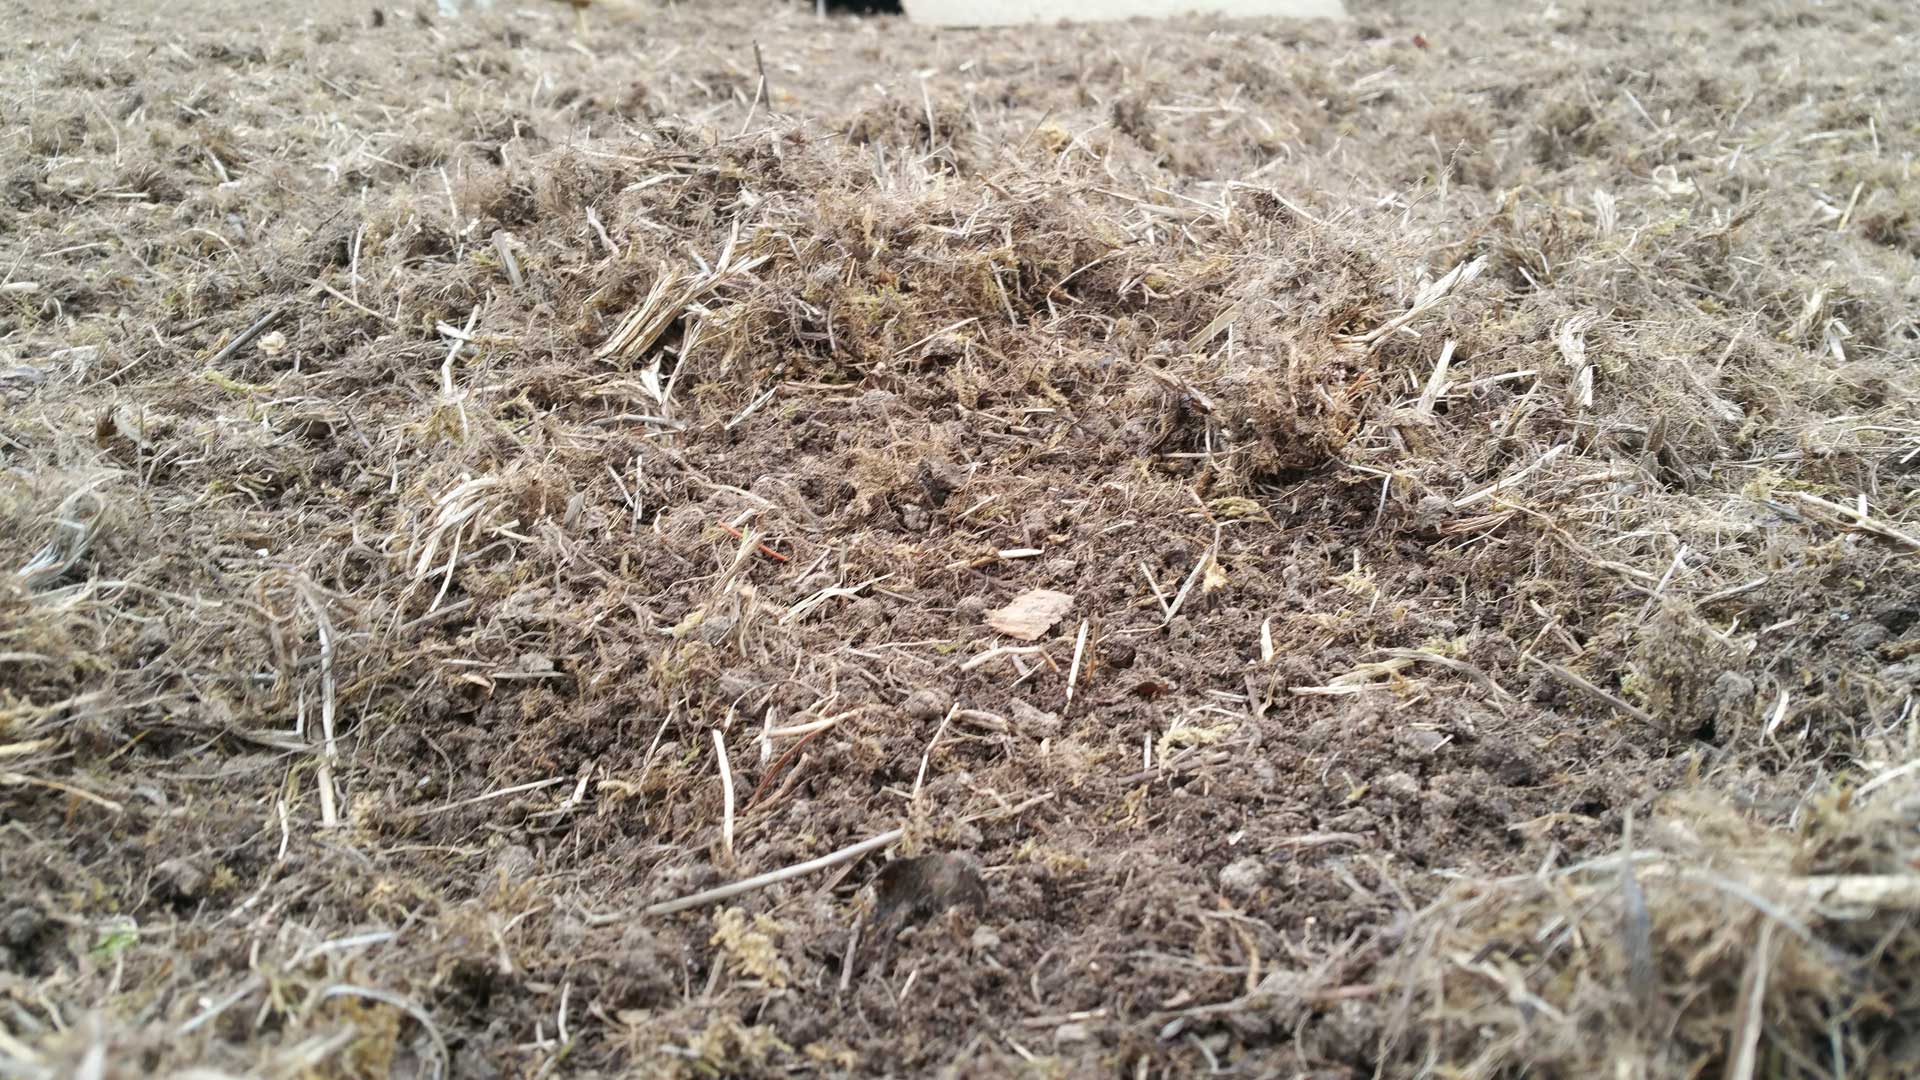
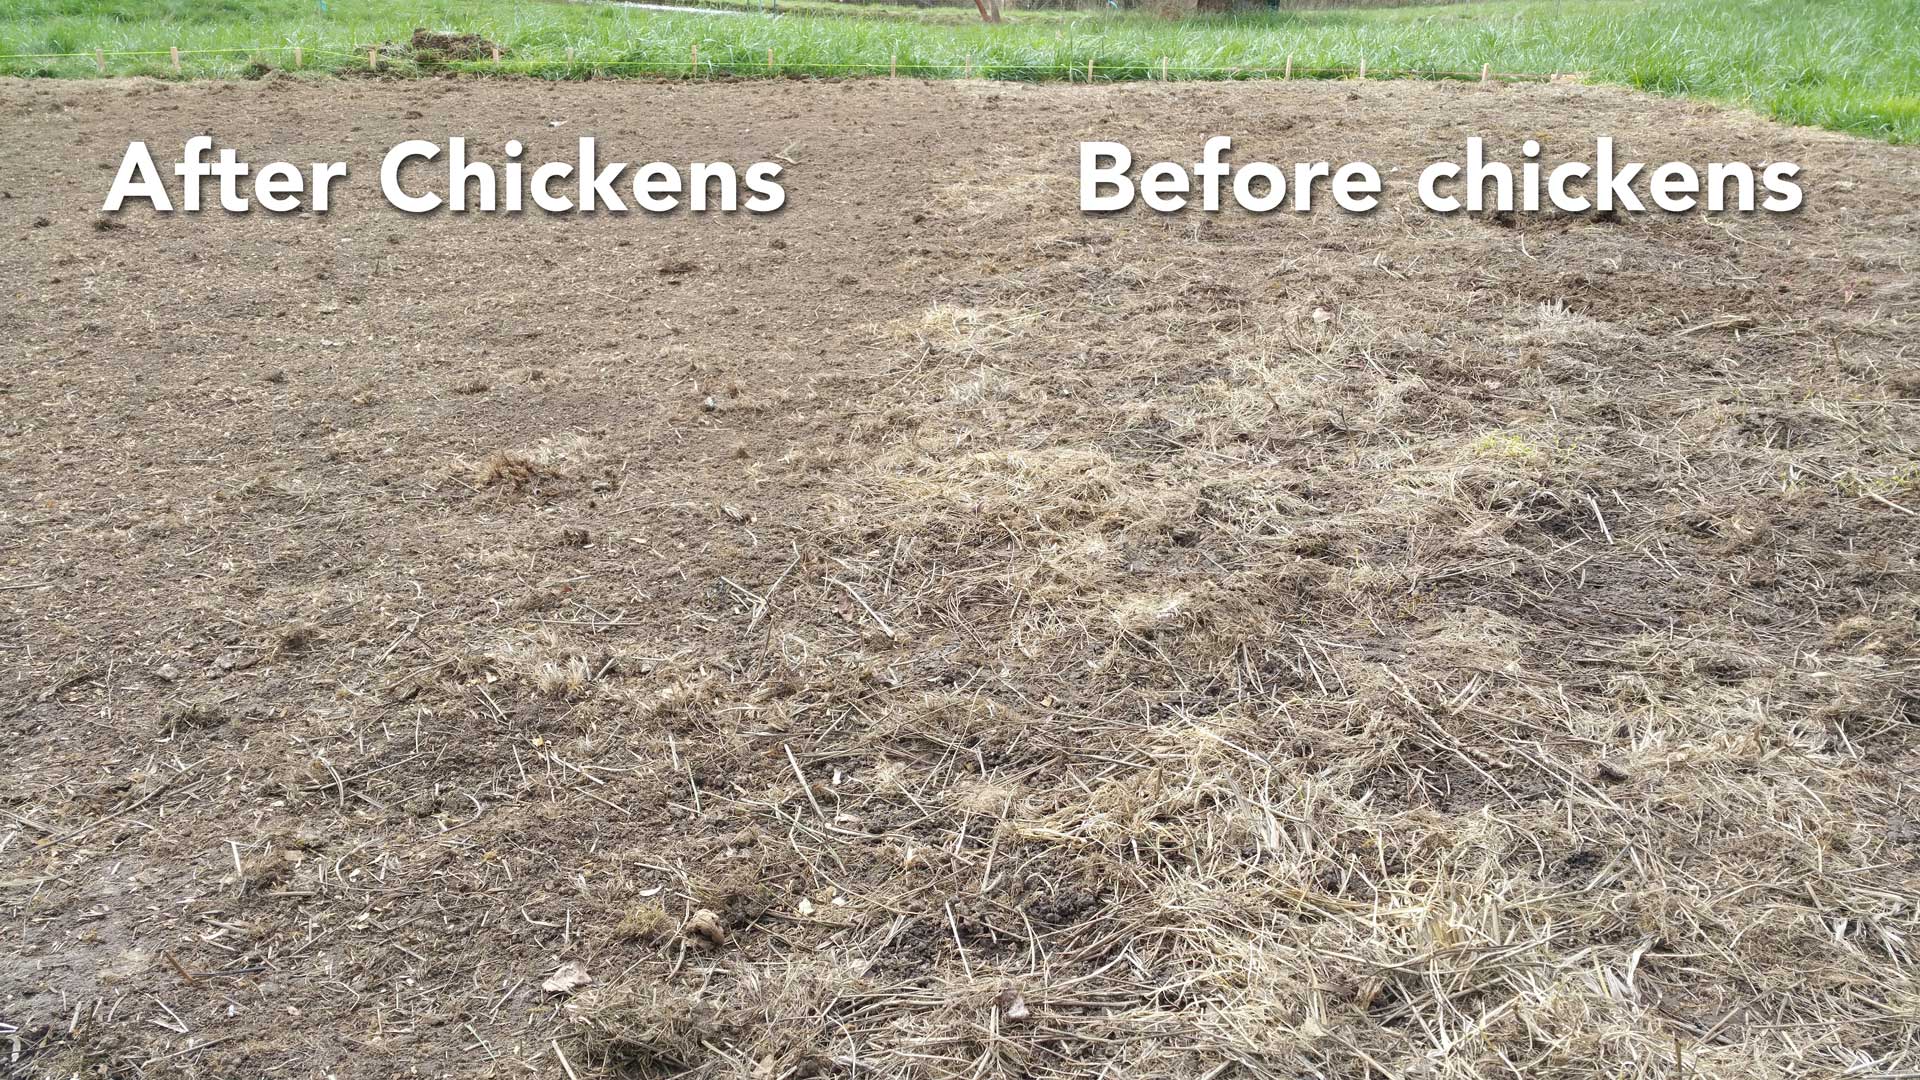
Beautiful Sandy Loam
Here is a series of images that show the results of the soil after removing the black plastic row cover; quackgrass-free soil beneath, teaming with Boa Constrictor-size worms and sandy loam.
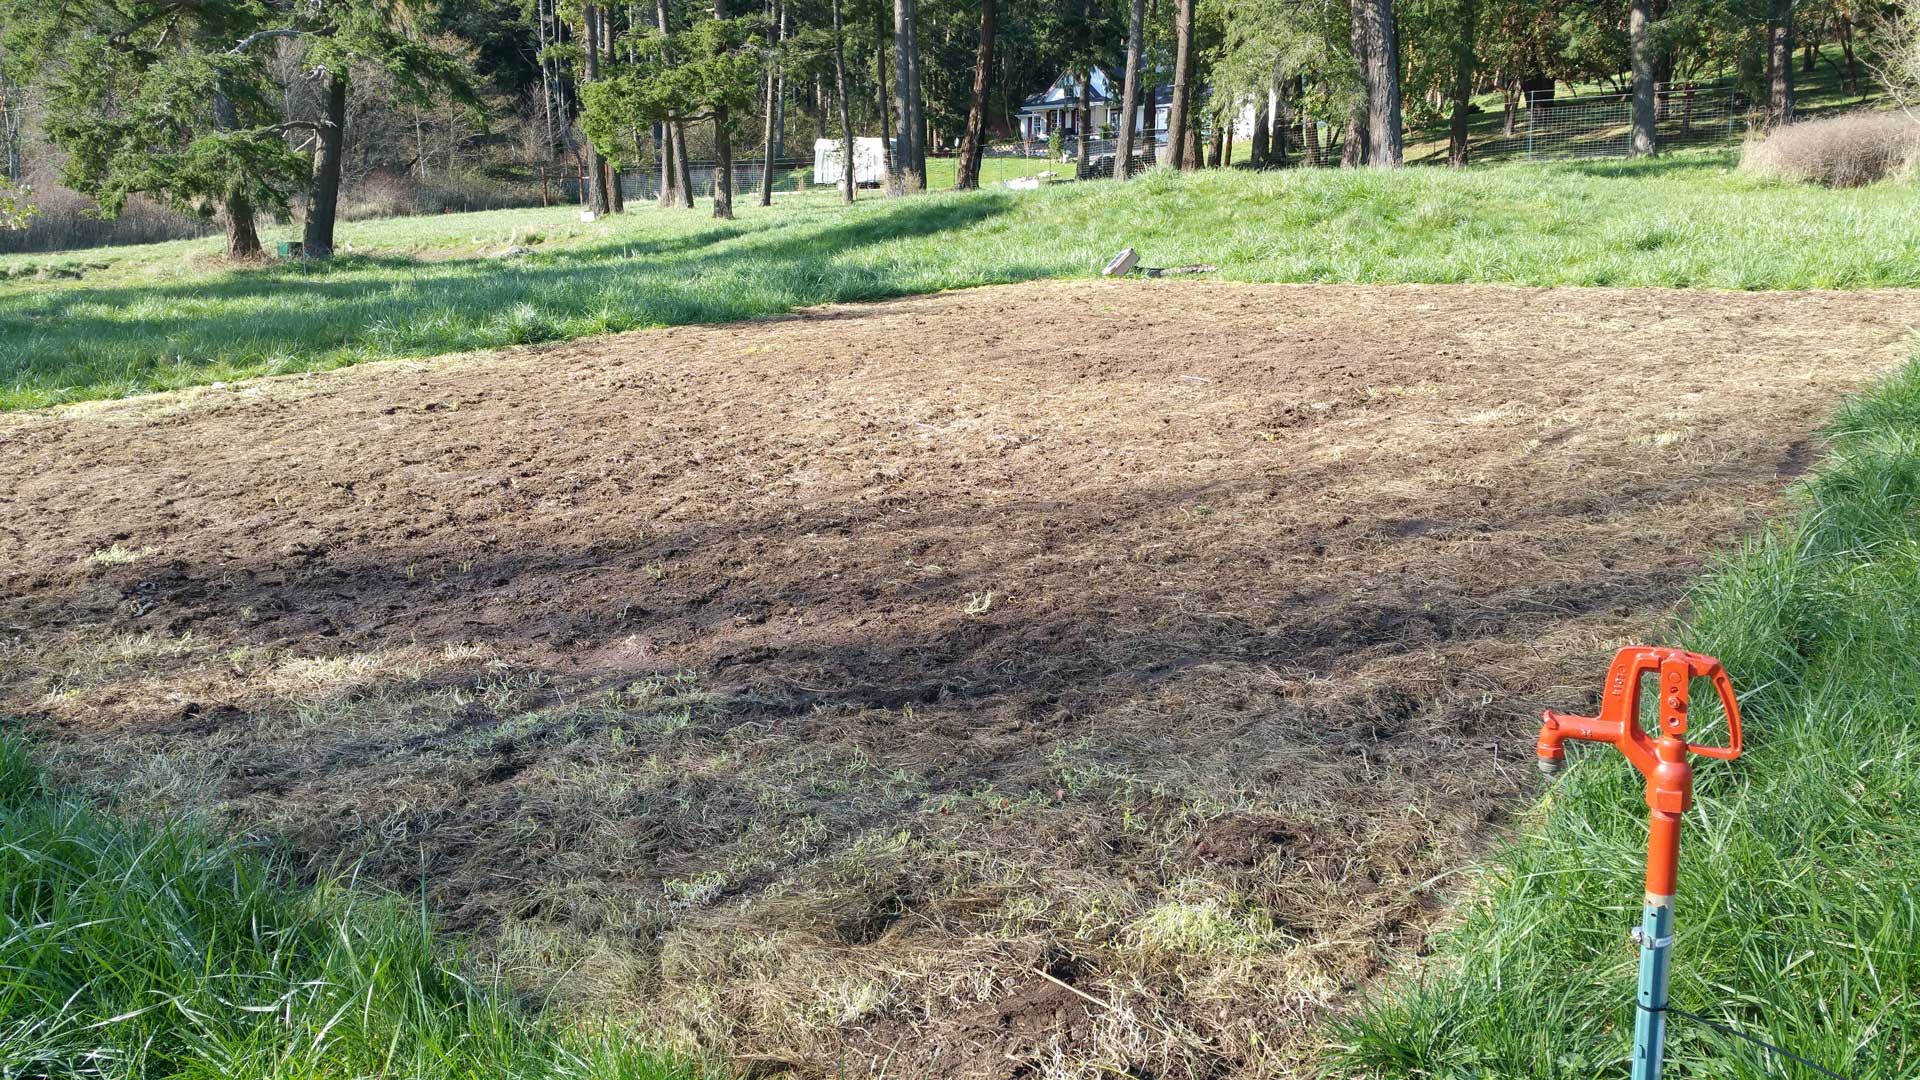
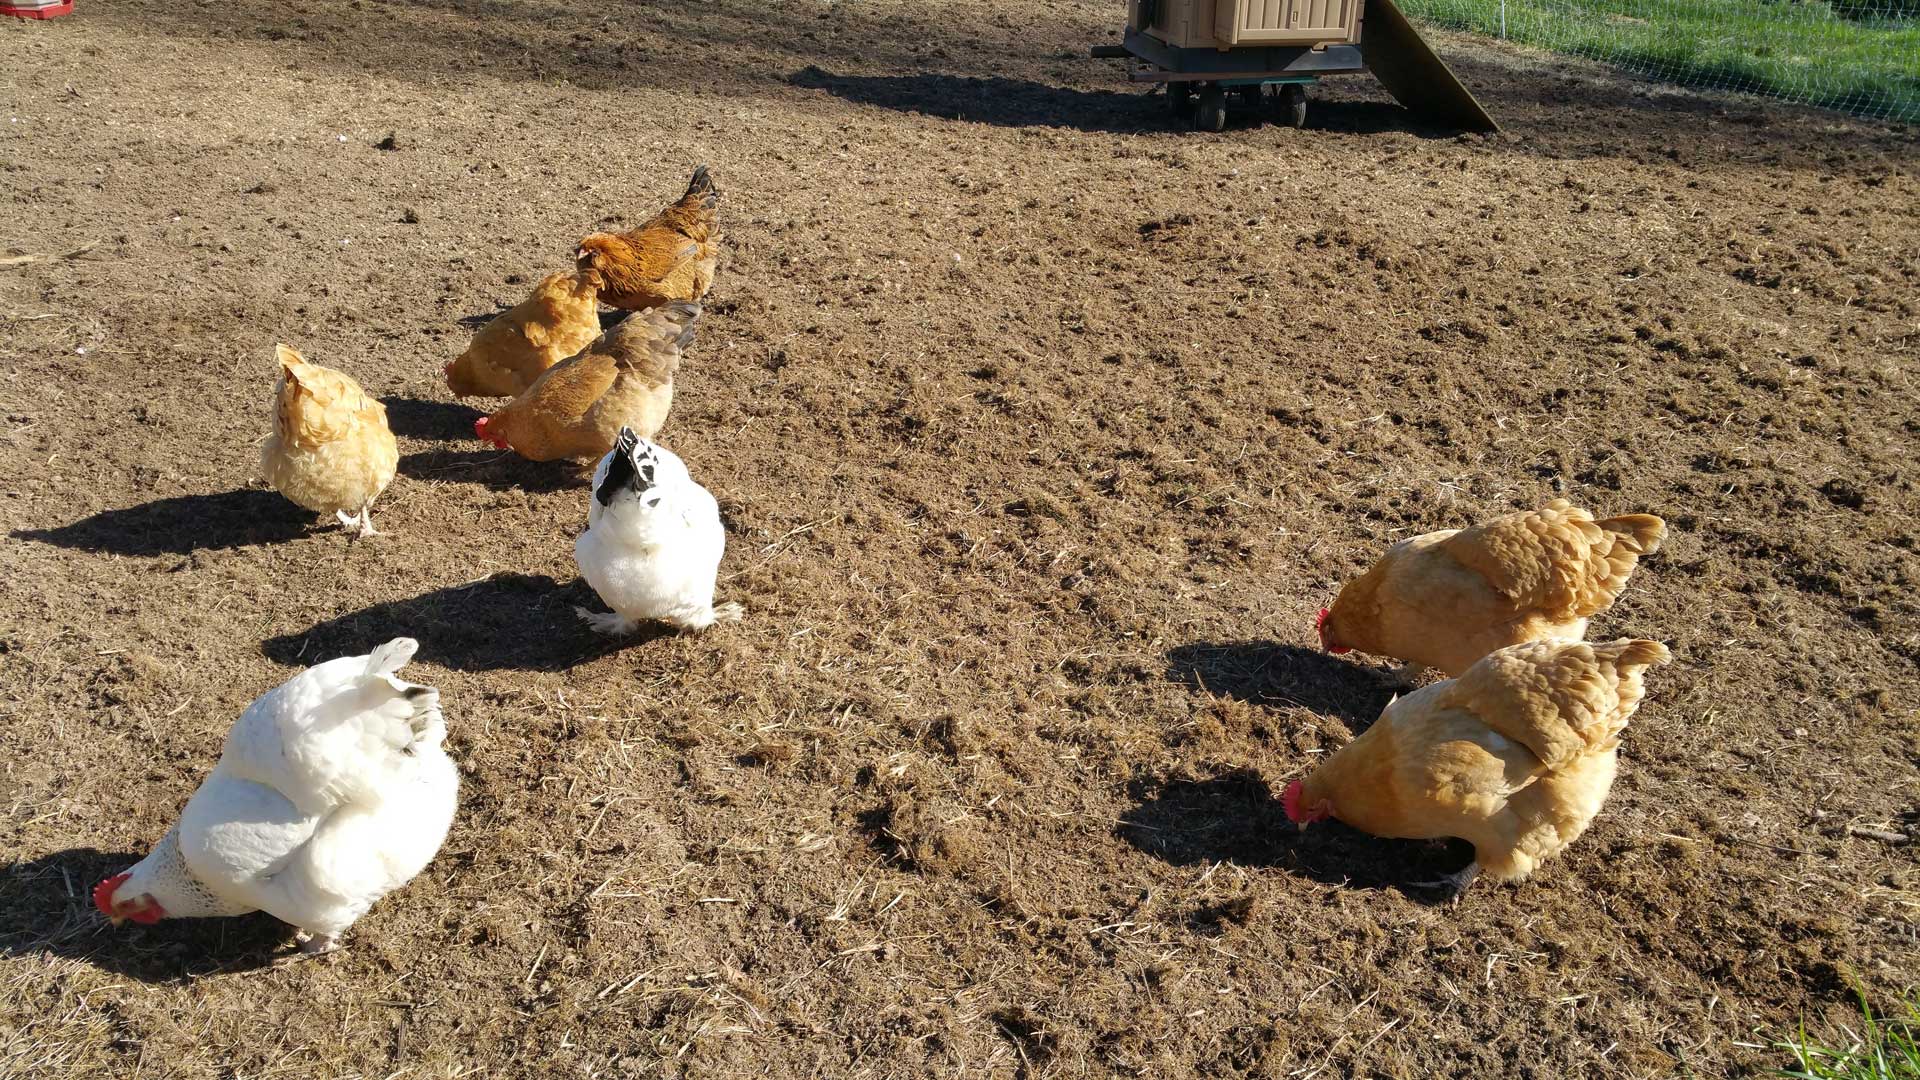
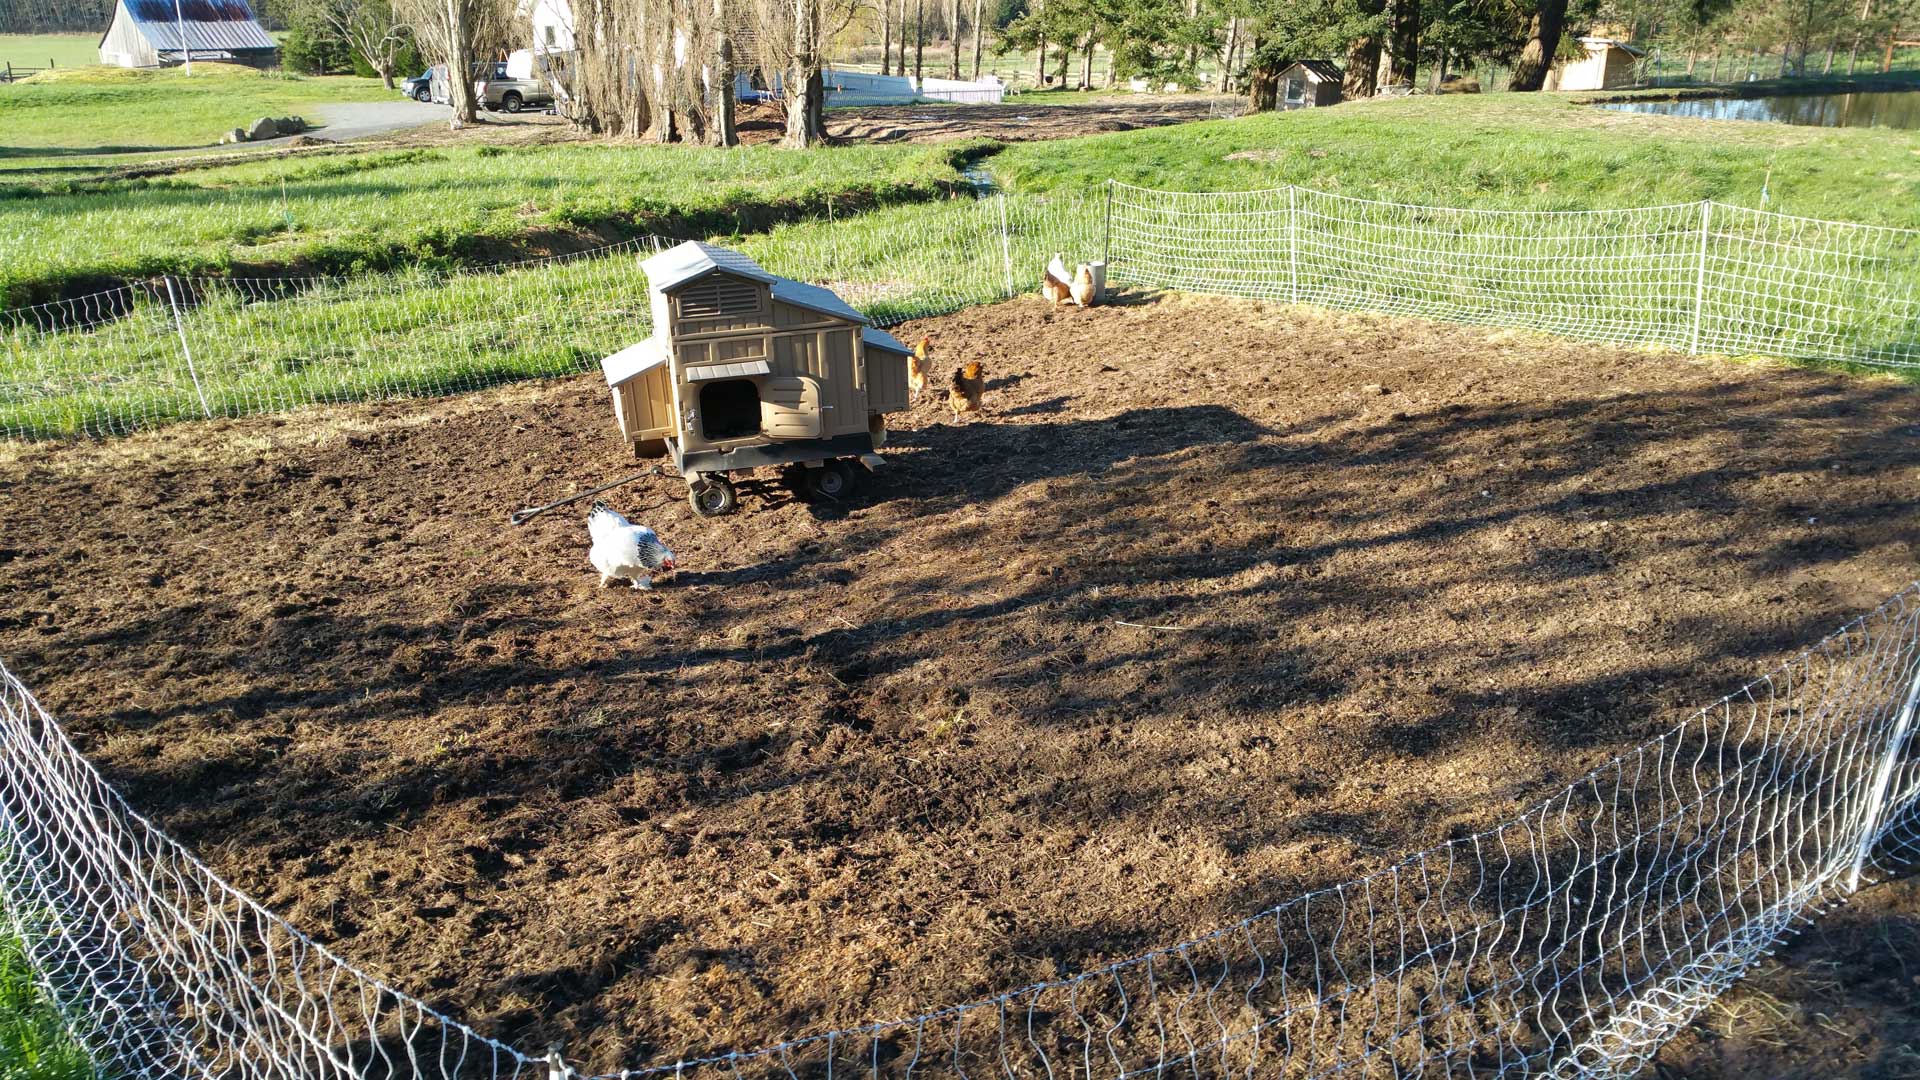
Letting The Chickens Back In
After the black row cover was removed, I placed the chickens back into a paddock that encircled the garden plot. In less than five days, they had lightly scratched the surface, removed any weed stragglers and pooped prolifically.
Frequently Asked Questions
Do you need to mow or till the quackgrass before covering it?
No, you do not need to prepare the quackgrass before you cover. If the grass is too tall to roll out the row cover, you can slash it down with a scythe before you cover it. Once it's covered, the lack of light and the passing of time will turn all of that grass into rich organic matter.
Do I need to use black row cover?
I find the black row cover to be the most economical and time efficient way of suppressing the quackgrass. As stated in the article, you could use wood chips poured on at least ten inches deep. However, my primary hesitation here is the time it would take to remove the wood chips in order to get started with the garden.
Are there other ways to eradicate the quackgrass besides supression?
There are other ways to deal with quackgrass if you don't have time to wait for the grass to die off. Heather Westwood, Kara Cox and Eric Gallandt out of the University of Maine's Sustainable Agriculture Program wrote a detailed study for managing quackgrass on organic farms.
Do you offer consultations when planning for things like this
Yes, I offer consultations when planning permaculture systems, gray water irrigation, zone planning, and overall homestead planning.
How long does it usually take to kill the grass
It all depends on the conditions where you live. My best advice it so cover the grass in the fall and uncover it in the spring just before planning out your garden.
Farmstead Life in Autumn
Autumn highlights a changing rhythm. Visitors become less of a fixture in downtown, school buses resume their morning and afternoon routes, and islanders begin to mingle about the cafés and parks again.
Free Drip Irrigation System for Distant Unestablished Chestnut Trees
Many nut trees and shrubs are incredibly drought tolerant after they mature. However, the first four to five years they might need a good amount of hydration to get proven with vast root systems. Utilize this technique to gradually deep water your brand-new trees with no need for costly and labor-intensive drip irrigation systems.