
So you’ve chosen your permaculture site.
You’ve lived on it long enough to understand the way water, light and air flow across the land.
You understand the patterns of traffic across the property; where you spend most of your time and the paths you walk across most frequently.
And now you’re ready to set about putting together your ultimate permaculture garden plan.

By no means is this post going to be all inclusive and cover every aspect of planning your permaculture system. Instead, I am simply going to share with you how I went about assembling my plan and the tools I’ve used to bring my ideas to a visual map of a fifty year plan.
Observation On Location –The first step in any permaculture system is knowing what lies before you. What is the flow of light across the landscape. Where do the prevailing winds blow from. What’s the soil quality like. What inputs are necessary to support life.
In point number two above, I mention light, water and air flow across the property. This is important for obvious reasons and some not so obvious. For instance, the wet season on my property is very different than the dry. Had I jumped right into placing my chestnut orchard, I would have chosen the wrong location. Where I had planned to place the trees is boggy in the winter and spring. This would have wreaked havoc on the little trees.
Also, had I not spent a full year with the property, I would have chosen the wrong location for my annual vegetable garden. Where I had originally planned to place the garden, I later came to realize was once the car parking lot for the previous owners. The dirt is so compact, that in the winter, it holds a lot of water on the surface. Furthermore, my children love to play in this area because it’s the flattest spot on the property and the first to warm up in the morning.
Needless to say, a plan starts with understanding what your primary objectives are and the foreknowledge that comes with time and experience on location.
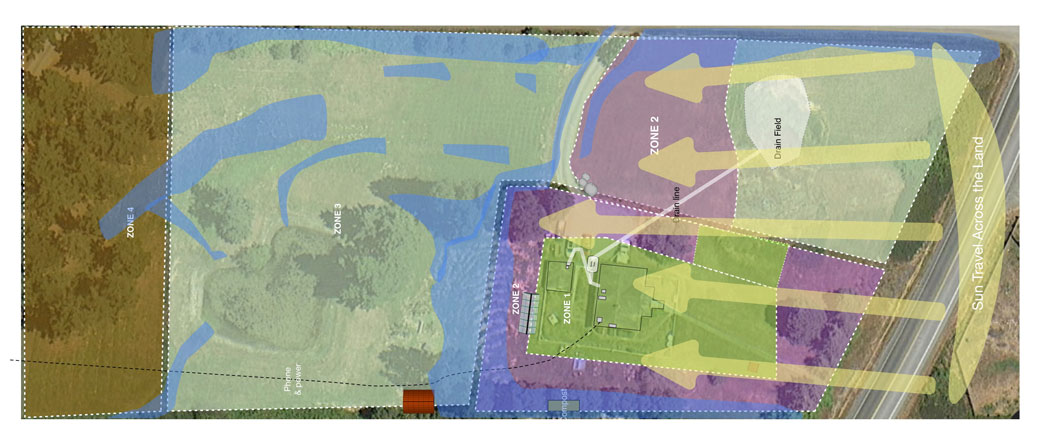
Therefore, the very first things to consider are how light, water and air flow across the land:
- where water pools
- where it dries out first
- where the warm spots are (pets will often tell us this by where they lie down)
- Where first light hits the property and where it stays sunny the longest
- Where do the prevailing winds blow from, do they shift with the seasons
- What paths people and animals take when traveling through the property
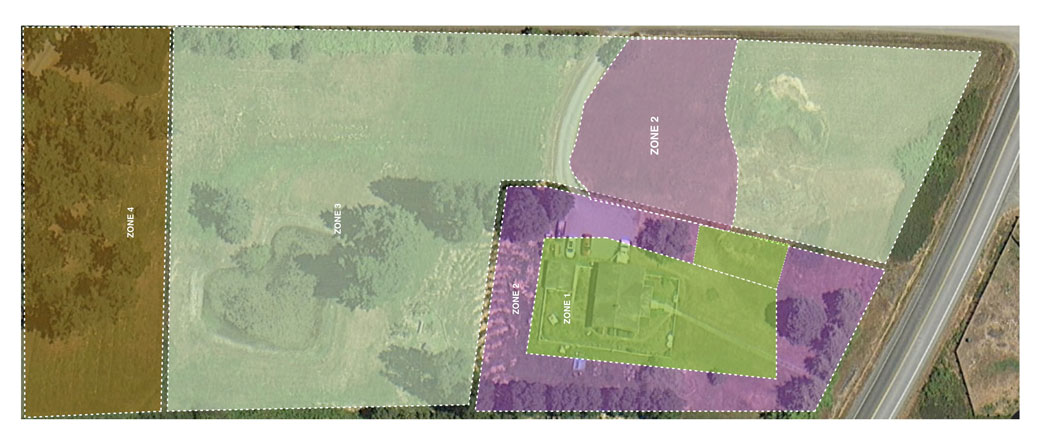
The next things to consider are the zones. It’s been well documented by many others, but let us briefly refresh ourselves, with a shortened version of this list and exactly how it applies to my approach when planning the homestead permaculture system around here.
Zone Refresher
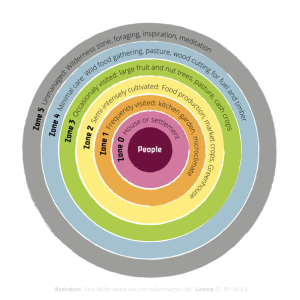
By Felix Müller – Own work, CC BY-SA 4.0, https://commons.wikimedia.org/w/index.php?curid=34650472
Zone 0: Represents the dwelling where the inhabitants reside.
Zone 1: Represents those more frequent areas. I like to think of these areas as those where you pass by everyday. Or those paths you take when unloading your groceries. Kitchen and or herb gardens might reside here.
Zones 2: Are those areas of the land that you would get to by taking a few steps off the Zone 1 path. In these areas, you would place your market garden, and the more intensely productive and cultivated food crops and or the green house.
Zone 3: This is the fruit and nut orchard. This zone gets plenty of attention but not everyday. It can be left alone for days on end. Here you might also place chickens and other livestock.
Zone 4: This is the more wild food production area. Here might reside food producing trees and shrubs that get a lot less management. You might graze your livestock through these areas at certain key seasons throughout the year. If you have a wood lot, this is where you might place it. Either here or in Zone 5. I like to go camping in my Zone 4
Zone 5: This is the unmanaged wilderness of your property.
But that’s a lot of space!
I know what you might be thinking, “I don’t have that much space.” Not all permaculture systems have the more outlying zones. You might be surprised at what you can achieve with smaller spaces. You can actually divide small 1/4 acre parcels into a similarly divided zone system. The key is considering your natural traffic patterns and overall objectives.
Two great resources come to mind if your space is limited:
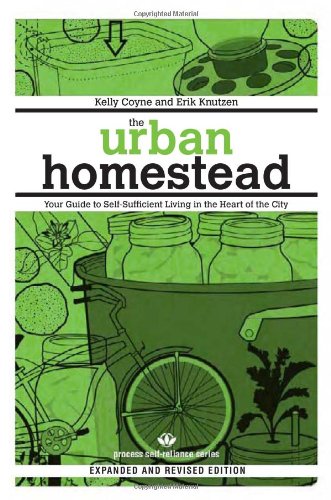
The Urban Homestead
A classic guide to self reliant living and growing food. “This celebrated, essential handbook shows how to grow and preserve your own food, clean your house without toxins, raise chickens, gain energy independence, and more. Step-by-step projects, tips, and anecdotes will help get you started homesteading immediately.”
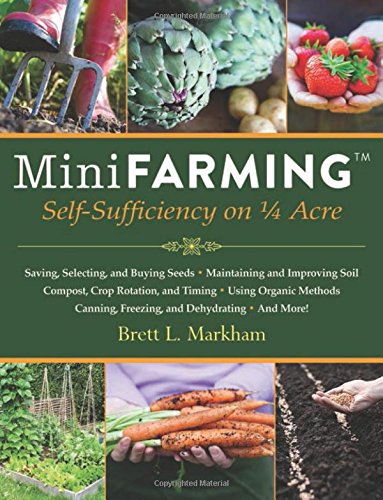
Mini Farming
Bret Markham wrote the book on 1/4 farming. His invaluable guide was an introduction to the my possibilities when living on a 1/3 of an acre in the California Bay Area. “Mini Farming describes a holistic approach to small-area farming that will show you how to produce 85 percent of an average family’s food on just a quarter acre.”
Illustrating the Plan
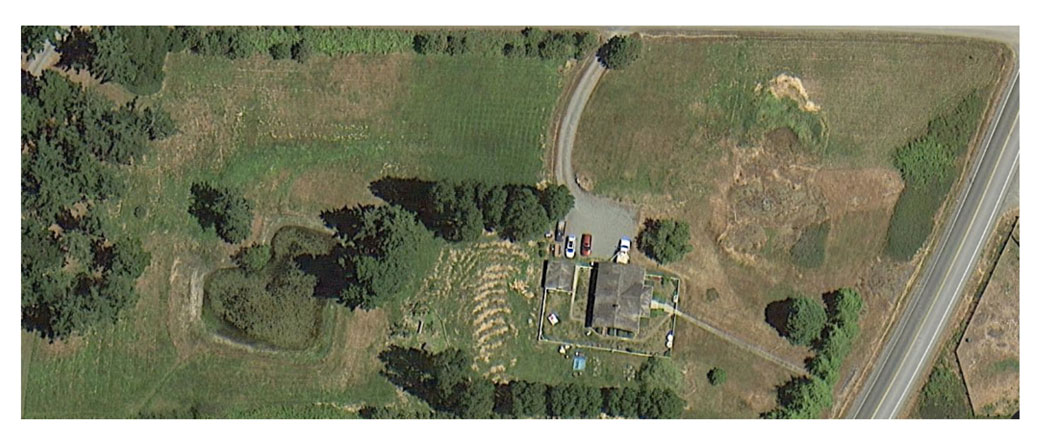
One way to illustrate your plan is to go down to your county survey department and ask them to print out a large overhead map of your property. The benefit here is they will usually have several years worth of images. This will allow you to track changes, much like I do using Google Maps. I had my county print out an image for me and it cost a mere five dollars. It measured forty inches by thirty inches and had a lot of detail.
With the idea of my zones in mind, I set out using an image from Google Maps, to plot out these key areas. As a digital native, I am comfortable using a computer for this process, so I imported the image into OmniGraffle and began freehand plotting my zones on a layer of their own.
OmniGraffle Tutorial
Watch this video and learn how how I use OmniGraffle (<– link to free download) to layout my garden design.
OmniGraffle is a powerful software application that utilizes free open-source stencils to quickly illustrate vector models and diagrams.
On Site Design Consultation
As I see it, everything up to this point has been about preparing for the life growing abundance that a well designed permaculture system can provide. This was a critical step in the planning process for me. And one that required a lot of time observing the land by walking around during each season. For us, our primary goal is self reliance through the incorporation of biodynamic poly functional assorted systems that feed off and from one another.
Once we know how the land lives and breaths, we get to embrace the conditions of our property and begin the fun part, spending time outside managing the land. And that means eating its bounty.
As a result, obvious decisions regarding the garden design begin to reveal themselves:
- The placement of gray water lines
- Woodlot location
- Wetland trees and shrubs placement
- Drought tolerant tree placement
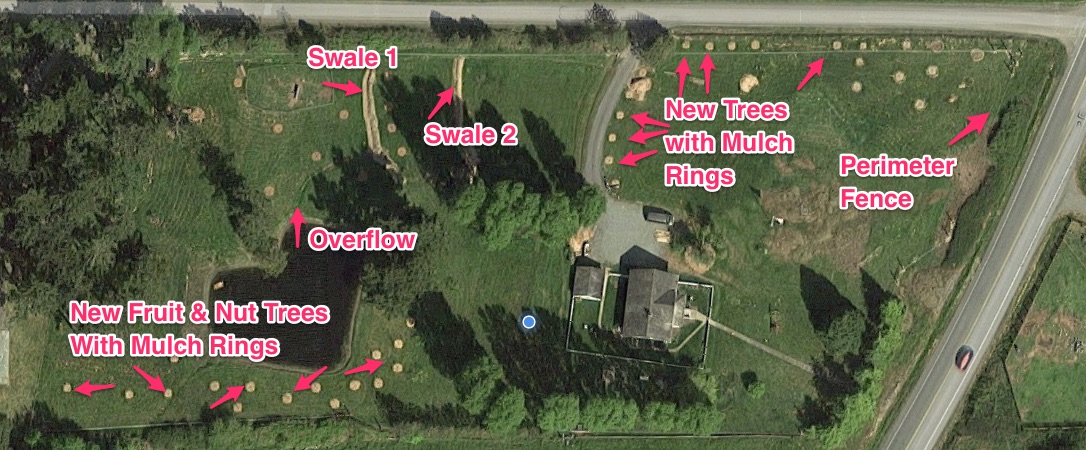
- Fruit and nut orchard
- Water catchment systems such as ponds and swales
- Market gardens (watch this clip about how to suppress invasive grasses to generate no till garden plots.)
A permaculture garden plan is time intensive and it continually evolves as you learn from the land. This is a very organic process that starts with knowing the location well.
I refer to my plan each spring before I set out planting more trees and every fall before cover cropping and sheet mulching. I do this to remind myself of the general areas and to update my design with the most recent plantings.
Do you have questions? I offer a flat consulting rate of $150 if you need some help. I also put together permaculture garden plans that you can roll the consult fee into if you’d like me to put something like this together for your land.
There are also some great resources out there when planning your own garden. I own several, but some of my favorites include:
Farmstead Life in Autumn
Autumn highlights a changing rhythm. Visitors become less of a fixture in downtown, school buses resume their morning and afternoon routes, and islanders begin to mingle about the cafés and parks again.
Mastitis Treatment without Antibiotics
In this video, I share an update on our progress with treating for mastitis for one of our Jersey Dairy Cows. We are doing everything possible to avoid using antibiotics and so far the signs are positive.
How To Slaughter Geese Using Two Methods: Kill Cone vs Hatchet
In this video, I demonstrate how to slaughter American Buff Geese using both the Kill Cone Method and the Hatchet (chopping block) Method. I include measured results of bleed out.
Where did you get the stencils you use? I’d be interested in any other software tips or addons for Omnigraffle you can share!
Thanks.
Hello, Adam: thank for making the connection here.
I like OmniGraffle for its simplicity of use and mostly the many helpful stencils available on the web. Here’s the stencil I use: https://www.graffletopia.com/stencils/23.
Regarding tips, my best advice is to pick an app, like OmniGraffle, Sketchup, Illustrator and stick with it. You’ll improve over time and can always go back to the source file and make edits along the way. My map has evolved over the years, and it’s very helpful to be able to step back through the versions and notice little things I’ve learned along the way.
Best of success to you my friend,
John
Hello there we lived the building raised beds utube flick using your two wheel tractor.
We really noticed & loved your chicken tractor. Can you tell us more about it ? Where got it ? Did you build it ? Are there plans ?
Any other information be so appreciated
Also do you recommend the two wheel tractors ?
Regards
Darren
Australia
Hello, Darren:
Thank you for your kind remarks. Are you referring to the mobile coop I use now or the wooden one I built a few years ago? If it’s the former, here’s a link to the mobile one online:
Regarding the walk-behind tractor, it’s a phenomenal piece of equipment. Depending on the size of your farm/garden, it’s an ideal solution to managing the land. I find them to be very pricey but they are well built and will last you a lifetime if well cared for. Look on the used market, there are often deals available. If not, go down to your local equipment rental/sales dealer and see if they can import one for you.
Best,
John
Nice post thank you!
Hello
My name is Ty Herfel and I am from Colorado. I am planning a fishing trip up on the Nooksack River (up off of FS 12 Road) this upcoming summerI saw this video below on youtube:
Flyfishing the South Nooksack River in Baker Lake National Forest
I was wondering if you could tell if that was where you were fishing and if that was the bridge that crosses Bell Creek, before the road makes a large bend. Just wondering how that road is, looking at going in late July and if a regular Tahoe type vehicle would make it.
Thank you for your time
Hello, Tyler:
That bridge is blocked and inaccessible to cars. The bridge leads to a dirt road and some camping spots.
Hi John,
I recently saw your video of fly fishing on the Nooksack River/Creeks in the area.
If you don’t mind, I would really like to know where you were fishing and how I can get there. I’m planning a day with my grandfather in 2 weeks. Thanks so much in advance.